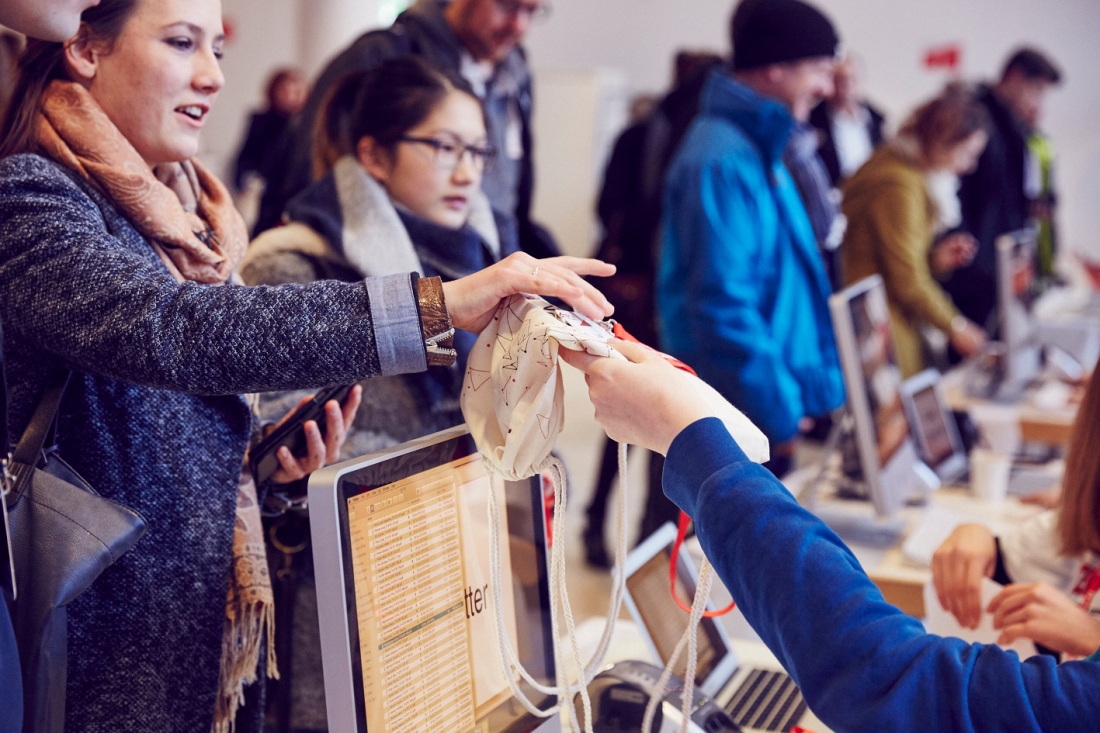
Attendee registration is more important than most event organizers realize: it’s the first interaction of an attendee with your event. They are probably tired, in need of a coffee, and a bit unsure about what to expect from the day, the people they’ll meet, and what they will take away from it. You can make or break an attendee’s mood and thus also their attitude toward your event in these first minutes. Have you ever arrived at a conference, spent the first 30 minutes in a queue which was hardly moving, to finally be greeted by a group of stressed team members who are frantically looking for your badge? Of course, they did not find it and ended up writing your name on an empty badge with a marker. You probably know what I am talking about, or have no trouble imagining that it’s a thoroughly unpleasant experience.
In this post, we are going to show you a registration process which requires no fancy software solutions, barcode scanners, or alphabetically sorted badges. It gives you flexibility for name changes until the moment the attendee checks in, and it can be achieved with a limited budget. Sounds too good to be true? We have been using the process at TEDxTUM for the past two years, checking in over 600 attendees in 45 minutes.

Ready? Here we go.
Our goal
We want to check in attendees of our event as swiftly as possible, not end up in complete chaos, make a professional first impression and be nice to everyone along the way. Oh, and we don’t want to spend half our budget or manpower on registration.
Simplify, simplify, simplify!
One thing I never really understood is why so many events use pre-printed badges. Not only is it more expensive to print individual files, you are also actively limiting your options in reacting to name changes. Sure, you might include a deadline for changing names in your disclaimer, but how much is your attendee going to love you if you let them transfer their ticket to a friend if they get sick the night before the event? Also, you need to sort badges in alphabetical order and locate the exact badge belonging to the attendee standing in front of you. And what if it’s not there, or they realize they misspelled their name when buying the ticket? It’s considerably less professional to hand-write names on fallback badges. In short, let’s get rid of the pre-printed badges and bring in some label printers!
Now you might think, ah, printing badge labels, I’ve heard of that. My ticketing system allows designing our own labels and sending them to a printer. The only catch: this feature is part of the super-duper-mega-pro-package, which you cannot afford. But do you really need it? Not at all – you can also generate labels as simple as with a software such as Microsoft Word mail merge.
Finally, you definitely don’t need to scan tickets, neither with a smartphone, nor with a fancy barcode scanner. You just need to know that each ticket is being used exactly once. This is built right into our process – just wait and see.
In this example we are going to create badges looking something like this:

I’m intrigued. Tell me what I need.
Consumables
- Lanyards: get some with a custom logo (we pay between 0,50-1,00 € for one-color print depending on quality and size of order)
- Badges: since all of them will be the same, you’ll only pay around 10-30 cents per badge! You can consider having different badges for your speakers, team and sponsors, or you can use differently colored lanyards instead. Remember: simplify, simplify, simplify!
- White Labels: 6 € per roll (works for hundreds of name stickers!)
Hardware
- Laptops: you will need one per 100 participants to register
- Label Printers: approx. 50€ / printer, e.g. Brother QL570, max. two laptops should share a printer.
- Network: you will need a stable wireless or wired internet connection. Stable does NOT mean your public conference wifi that you will be sharing with all the guests!
Software
- All Laptops should run either Windows or OS X. It should be the same operating system for all of them. ALL OF THEM.
- A brand-new, empty Dropbox account (or use a cloud file service of your choice) which is configured on each of the laptops.
Okay, let’s get this show on the road!
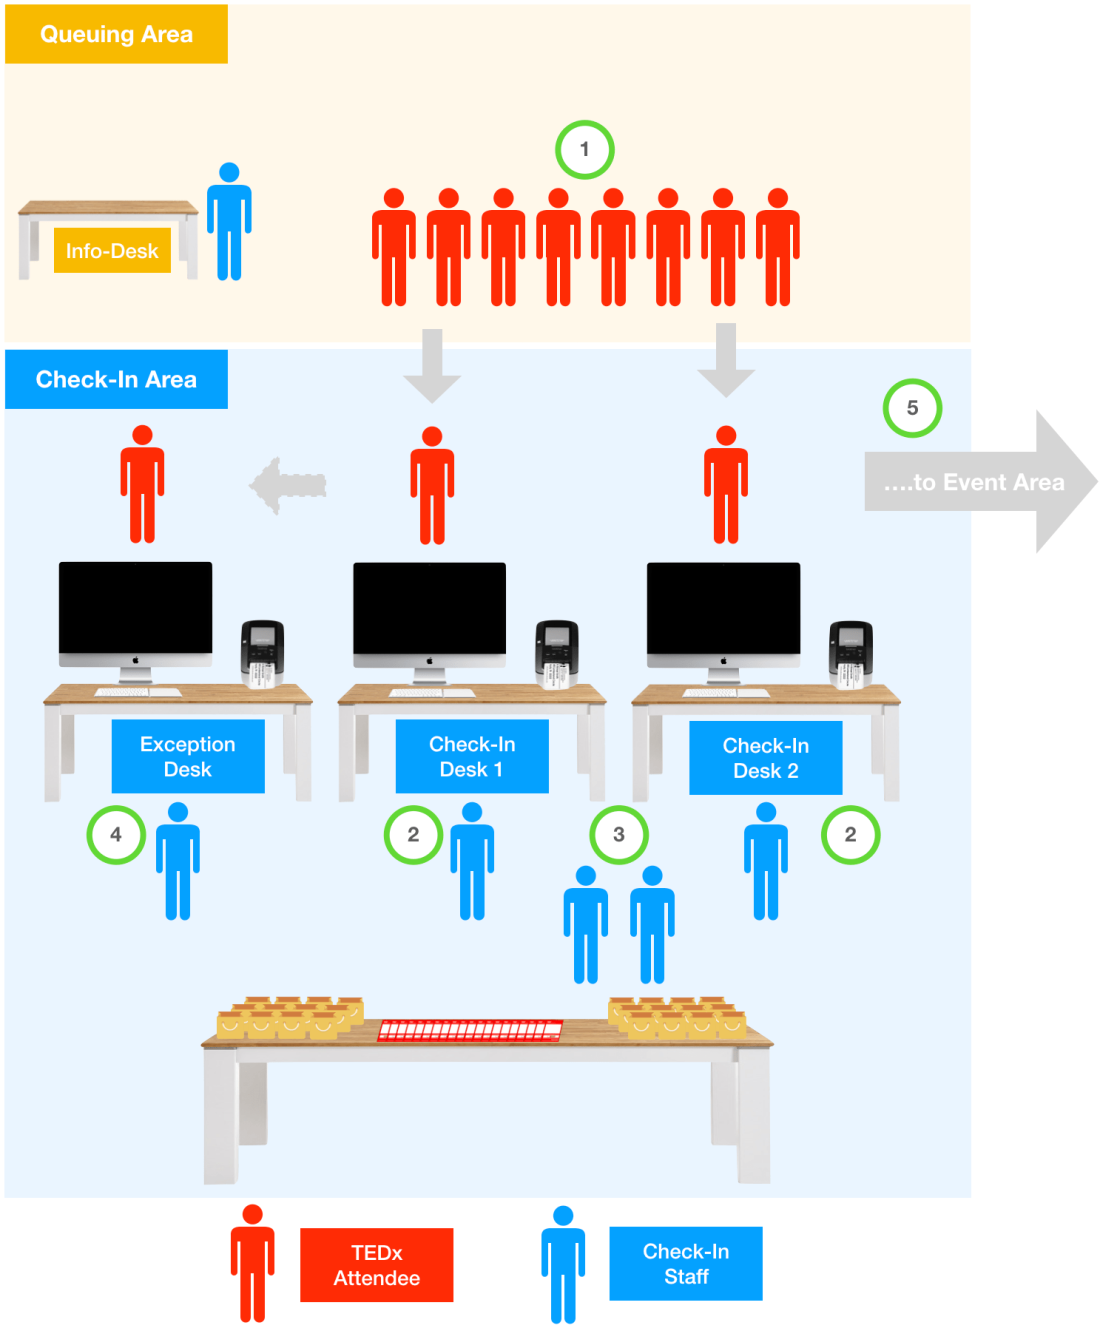
The following figure visualizes a simple registration process consisting of three areas. Each attendee first arrives in the Queuing Area. Here some volunteers answer important questions like “Is this the TEDx event?” or “Where is the bathroom?” but most of the time they ask people to queue up (1) at one of the registration booths in the Check-In Area.
Each of the check-in desks consists of
- Two volunteers
- A laptop
- A label printer
- Lots of empty badges and lanyards
- Anything else you want to give to your attendees, e.g. goodie bags (optional)
Two volunteers are working together at each check-in desk. The first volunteer, let’s call her Anna (2), warmly welcomes the attendee, finds their name label in the shared folder and prints it. The second volunteer (3), Peter, is responsible for the collection of lanyard, badge and any other material you want to hand out to your attendees. After a name label has been printed, Anna can already serve the next attendee.
If anything goes wrong, like the name label could not be found or the attendee has any special requests which cannot be solved in under 15 seconds, the attendee is sent to the exception desk (4) where a member of the organisation team takes care of him. This helps to avoid bottlenecks and keeps the check-in desks operational at all time. After the check-in was successful, attendees are sent to the Event Area (5) in which they will be expected to wear their badge at all times.
Peachy. How do we set up this process?
Set up one or more check in booths
Our experience shows you need around 20 seconds to check in a attendee, say some nice words and guide them to the venue (preferably toward the wardrobe and the coffee machines). This means that each check in counter can accommodate 3 attendees per minute.
Let’s say that you want to check-in 500 people in 30 minutes, you will need 5-6 check in booths. (500 people divided by 30 minutes divided by 3 check-ins per minute).
Set up an exception booth
This booth should have the same setup as a check in booth, but should be staffed with a person able to solve even the craziest check-in problems. Crazy means things like “My girlfriend broke up with me yesterday, so I brought her cat instead of her, but the cat is vegan. Can we switch the food for this ticket?”
Okay, let’s not aim to get to this, but there might be some imaginative ticket transfers and people whose friend registered them under their aunt’s maiden name, but misspelled it in the process. Your best bet is to put a person who was responsible for the ticketing system here, and make sure to bring them water from time to time.
The mighty attendee list
You will need a list of all attendees. ONE. Avoid, at all costs, a situation like “Oh yes, we put the press staff into this Excel sheet and one more thing, here is a print out of speakers’ guests”. One list – all attendees.
You can create this list on the day before your event so you have the best chance to include all last-minutes changes. You can check out our sample to see which columns we save (it’s more than we need to generate the badges, but we also use it for other purposes so we keep all this information in one file).
![]()
Prepare the badges
Remember our motto? Our goal is to provide the simplest registration process possible. This means we prepare anything we can prepare upfront to reduce the load on the volunteers on the event day itself. This includes creating the name labels for each attendee upfront. This following figure shows an example of a self-adhesive name label we put on the attendees’ badges.
![]()
We create the name labels based on the attendee list the day before the actual event. Name changes which happen after this deadline will be handled by the exception desk. The simplest way to create a pdf file for each attendee is to use Microsoft Word’s Mail Merge functionality. (You’re a nerd who knows what they’re doing? Drop us an email for a more sophisticated node.js based solution).
You first create a Word Document with the appropriate page dimensions for your name labels (e.g. 50mm width). You will probably need to print some badges to find the right settings, but this can be tweaked way before the event. Afterwards you import your attendee list using the mail merge feature. A nice tutorial can be found here.
Brief your volunteers
It’s absolutely mission-critical to brief your registration volunteers with a focus on the following three areas:
- Warmly Welcome Attendees: you are the first faces an attendee will see in the morning. Even if you missed you coffee: smile and be nice and helpful!
- Attendees need and want to know the basics first: where is the coffee, where are the bathrooms and where can they get rid of their coats.
- Your time is limited: be as nice as you can but try to get people into the event area as quickly as possible. So solve problems pragmatically and make use of the exception desk if someone diverges from the process.
It sounds stupid, but your best bet is to gather all your registration volunteers once the printers and computers have been set up and act out both the standard registration scenario as well as a couple of exceptions. Everyone should know in their sleep how to register people, which will enable them to be efficient (and friendly!) under pressure.
Where to go from here
There a multiple ways how you could extend this process once you’ve stress-tested it with your team. Here are some examples what we did:
- Use two laptops per registration desk and let them share one printer
- Flag your attendees in the registration list to e.g. mark their food choices on each badge
- Print custom, colored name-tags for different attendee groups (team, press, speakers etc.)
That’s it, everyone. At the end of the day, it doesn’t matter so much what your process is like as long as it works for your team. Do not skimp on planning your registration, though – it’s really a hygiene factor for attendees and making it smooth will improve their experience from the very first minute.
Let us know if this process has worked for you and whether we forgot to describe something. We’re happy to adapt this article to be most helpful to everyone!